
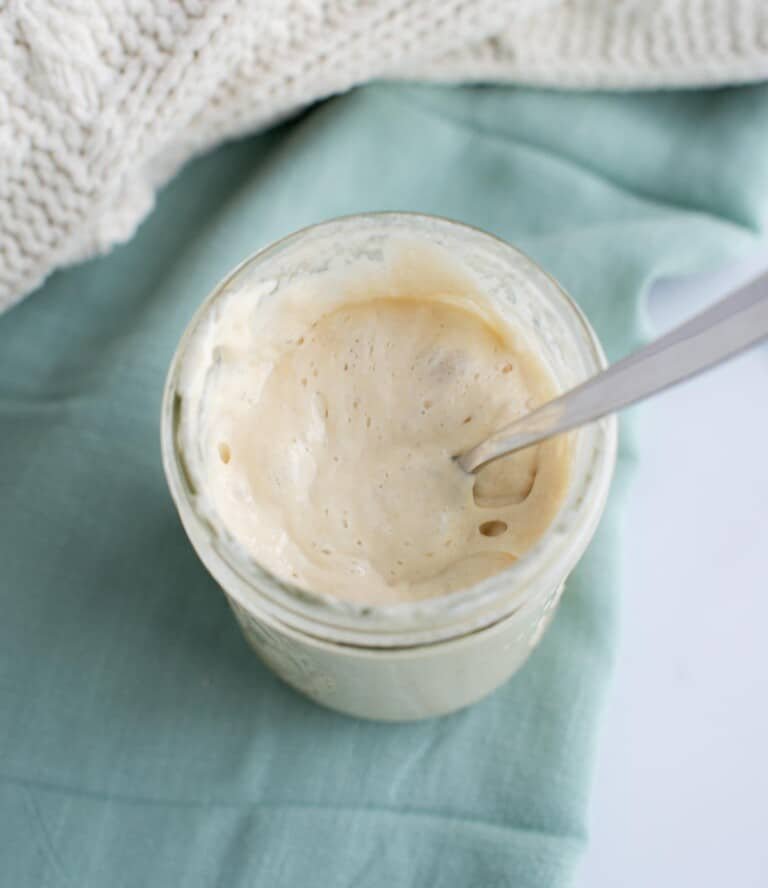
What Is a Sourdough Starter?
A sourdough starter is a fermented mixture of flour and water that captures wild yeast and naturally occurring bacteria from the environment. As the starter is fed regularly, these microorganisms multiply, producing carbon dioxide that helps bread rise naturally while developing rich, tangy flavors.
Unlike commercial yeast, a sourdough starter becomes stronger over time with proper care and regular feeding.
What You’ll Need
- Active sourdough starter
- Bread flour, all-purpose flour, or whole wheat flour
- Filtered or dechlorinated water
- Digital kitchen scale
- Clean glass jar or food-safe container
- Spoon or silicone spatula
- Rubber band or marker to track growth
Basic Feeding Ratio
One of the most common feeding schedules uses a 1:1:1 ratio by weight:
- 50g sourdough starter
- 50g water
- 50g flour
This ratio is simple, easy to remember, and works well for most home bakers.
You can also use larger feedings, such as:
- 25g starter + 50g water + 50g flour (1:2:2)
- 20g starter + 60g water + 60g flour (1:3:3)
Larger feedings provide more food for the yeast and can keep the starter active for a longer period before the next feeding.
How to Feed Your Sourdough Starter
Step 1: Discard
Before feeding, remove all but the amount of starter you plan to keep.
For example, leave 50g of starter in the jar and discard the rest, or save the discard for recipes like pancakes, crackers, muffins, waffles, pizza dough, or biscuits.
Discarding keeps the starter manageable and ensures it receives enough fresh flour and water.
Step 2: Add Water
Add the measured water to the remaining starter.
Stir until the starter loosens and becomes milky.
Step 3: Add Flour
Add the flour and stir until no dry flour remains.
Scrape down the sides of the jar with a spatula.
The mixture should resemble a thick pancake batter.
Step 4: Mark the Level
Use a rubber band or dry-erase marker to indicate the starter’s height immediately after feeding.
This makes it easy to monitor how much it rises.
Step 5: Let It Ferment
Cover the jar loosely with a lid or breathable cover.
Allow the starter to ferment at room temperature until it reaches its peak.
Depending on the temperature, this usually takes 4–8 hours.
How Often Should You Feed Your Starter?
If Stored at Room Temperature
If you bake frequently and keep your starter on the counter:
- Feed once every 24 hours.
- In very warm kitchens, feed every 12 hours if the starter peaks and collapses quickly.
If Stored in the Refrigerator
If you bake only occasionally:
- Feed the starter.
- Let it sit at room temperature for 1–2 hours to begin fermenting.
- Refrigerate it.
- Feed it about once a week to keep it healthy.
Before baking, remove it from the refrigerator, feed it, and allow it to become active and reach its peak.
Signs of a Healthy Starter
A healthy starter should:
- Double or triple in size after feeding
- Be filled with bubbles throughout
- Have a light, airy texture
- Smell pleasantly tangy, yeasty, or slightly fruity
- Rise predictably after each feeding
These are the best indicators that your starter is ready for baking.
Common Problems and Solutions
Starter Isn’t Rising
Possible causes include:
- Cold room temperature
- Underfeeding
- Weak or immature starter
- Chlorinated water
Move the starter to a warmer location, feed it consistently, and allow a few days for it to regain strength.
Hooch on Top
A gray or brown liquid, often called hooch, means the starter is hungry.
Simply pour it off or stir it back in, then feed the starter.
Frequent hooch formation usually means it’s time to feed more often.
Sour or Alcohol Smell
A strong acidic or alcoholic aroma usually indicates the starter needs feeding.
This is normal and not usually a sign that anything is wrong.
Mold or Pink Streaks
If you notice mold or pink, orange, or fuzzy discoloration, discard the entire starter immediately and begin a new one.
Best Flours for Feeding
Different flours affect how your starter behaves:
- Bread flour: Produces a strong, active starter with excellent gluten development.
- All-purpose flour: Great for everyday maintenance and easy to find.
- Whole wheat flour: Encourages faster fermentation and increased microbial activity.
- Rye flour: Highly nutritious for wild yeast and often boosts sluggish starters.
Many bakers maintain their starter with bread or all-purpose flour and occasionally feed it whole wheat or rye for added strength.
Helpful Maintenance Tips
- Feed your starter on a consistent schedule.
- Use filtered or dechlorinated water whenever possible.
- Keep your jar clean by wiping down the sides after feeding.
- Use a kitchen scale for accurate measurements.
- Store the starter in a warm location, ideally 75–80°F (24–27°C).
- Wait until the starter reaches its peak before using it in bread recipes.
- Save sourdough discard for other baked goods instead of throwing it away.
Storage Tips
If you bake weekly, storing your starter in the refrigerator is an easy way to reduce maintenance. Feed it once a week, even if you aren’t baking.
If you bake several times a week, keeping your starter at room temperature with daily feedings ensures it’s always ready to use.
For long-term storage, you can also dry or freeze a healthy starter as a backup in case something happens to your active culture.
Final Thoughts
Feeding and maintaining a sourdough starter is simple once you establish a routine. By providing fresh flour and water on a regular schedule, monitoring its rise, and storing it properly, you’ll keep your starter healthy and active for years to come. A well-maintained starter rewards you with beautifully risen loaves, rich flavor, and the satisfaction of baking naturally fermented bread from scratch.
