
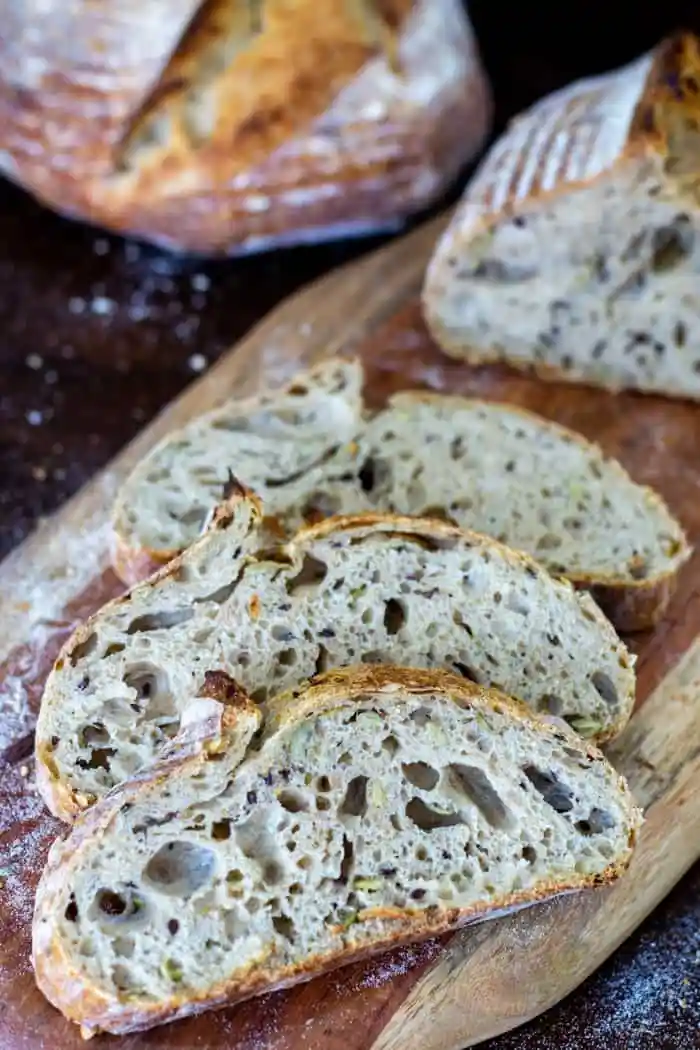
Ingredients
For the Sourdough Starter
- 100g active sourdough starter (bubbly and recently fed)
- 100g whole wheat or bread flour
- 100g water
For the Bread Dough
- 500g bread flour
- 350g water (about 70% hydration)
- 100g active sourdough starter
- 10g salt
Equipment
- Large mixing bowl
- Kitchen scale
- Dough scraper
- Clean kitchen towel or bowl cover
- Proofing basket (banneton) or bowl lined with a towel
- Dutch oven or heavy baking pot
- Sharp knife or bread lame for scoring
Step-by-Step Sourdough Bread Process
Step 1: Prepare an Active Starter
Before making bread, your sourdough starter must be strong and active.
A healthy starter should:
- Double in size after feeding.
- Have many bubbles throughout.
- Smell pleasantly sour and fermented.
- Look airy and slightly stretchy.
Feed your starter several hours before baking so it reaches its peak activity when added to the dough.
Step 2: Autolyse (Resting the Flour and Water)
Autolyse is a resting period that allows flour and water to fully combine before adding the starter and salt.
Instructions:
- Add 500g bread flour and 350g water to a large bowl.
- Mix until all the flour is hydrated.
- Cover the bowl and let it rest for 30 minutes to 1 hour.
Why Autolyse Helps:
- Improves dough strength.
- Makes kneading easier.
- Creates a better texture.
- Helps develop a more open crumb.
Step 3: Mix the Dough
After the autolyse period:
- Add 100g active sourdough starter.
- Add 10g salt.
- Mix everything together until evenly combined.
- The dough will feel sticky at first, but it will become smoother as fermentation continues.
Step 4: Bulk Fermentation (First Rise)
Bulk fermentation is one of the most important stages of sourdough baking. During this time, the starter ferments the dough and creates flavor and structure.
Instructions:
- Place the dough in a lightly greased bowl.
- Cover and let it rest at room temperature.
- Allow the dough to rise for about 4–6 hours.
The timing depends on:
- Room temperature.
- Strength of your starter.
- Flour type.
- Amount of water in the dough.
Signs Bulk Fermentation Is Complete:
- Dough has increased in volume by about 50%.
- Surface looks smoother and slightly domed.
- Small bubbles appear.
- Dough feels lighter and elastic.
Step 5: Stretch and Fold the Dough
Stretching and folding replaces traditional kneading and builds gluten strength.
Instructions:
During the first 2 hours of bulk fermentation:
- Wet your hands slightly.
- Lift one side of the dough.
- Stretch it upward gently.
- Fold it over the center.
- Turn the bowl and repeat on all sides.
Repeat this process every 30 minutes for 3–4 rounds.
Benefits:
- Strengthens the dough.
- Improves shape.
- Creates a better crumb structure.
Step 6: Pre-Shape the Dough
Once bulk fermentation is complete:
- Place the dough onto a lightly floured surface.
- Gently shape it into a round ball.
- Let it rest uncovered for 20–30 minutes.
This resting period allows the gluten to relax before final shaping.
Step 7: Final Shape and Proof
Instructions:
- Shape the dough into a tight round loaf.
- Place it seam-side up into a floured proofing basket.
- Cover and allow it to proof.
You can choose:
Same-Day Proof:
- Leave at room temperature for 1–3 hours.
Cold Proof:
- Place in the refrigerator for 8–24 hours.
Cold proofing improves flavor and makes scoring easier.
Step 8: Score the Dough
Scoring allows the bread to expand properly during baking.
- Remove the dough from the refrigerator.
- Place it on parchment paper.
- Use a sharp blade to make a shallow cut across the surface.
A simple slash is enough for beginners.
Step 9: Bake the Sourdough Bread
Instructions:
- Preheat the oven to 450°F (230°C) with a Dutch oven inside.
- Carefully place the dough into the hot pot.
- Cover and bake for 20 minutes.
- Remove the lid.
- Continue baking for another 20–30 minutes until deeply golden brown.
Baking Tips:
- Steam helps create a crispy crust.
- A hot baking surface improves oven spring.
- Avoid opening the oven too often.
Step 10: Cool the Bread
Cooling is an essential final step.
- Remove the bread from the oven.
- Place it on a wire rack.
- Let it cool for at least 1–2 hours before slicing.
Cutting too early can make the inside gummy because the crumb is still setting.
Understanding the Sourdough Timeline
Day Before Baking
- Feed sourdough starter.
- Prepare ingredients.
- Plan fermentation schedule.
Baking Day
- Mix flour and water.
- Add starter and salt.
- Complete bulk fermentation.
- Stretch and fold dough.
- Shape the loaf.
- Proof dough.
- Bake and cool.
Common Sourdough Mistakes and Fixes
Dense Bread
Possible causes:
- Weak starter.
- Under-fermented dough.
- Too much flour added during shaping.
Fix:
- Use an active starter.
- Allow proper fermentation time.
Flat Loaf
Possible causes:
- Over-proofing.
- Weak gluten structure.
Fix:
- Strengthen dough with folds.
- Monitor proofing time.
Gummy Interior
Possible causes:
- Bread sliced too soon.
- Underbaking.
Fix:
- Cool completely.
- Bake until the crust is deeply colored.
Final Tips for Successful Sourdough Bread
- Keep your starter healthy and well-fed.
- Use a kitchen scale for accurate measurements.
- Learn to judge dough by appearance and texture, not only time.
- Be patient—good sourdough develops slowly.
- Keep notes on each bake to improve your results.
Mastering sourdough bread is a process of learning how fermentation, gluten development, and baking work together. With practice, you can create homemade bread with a crisp crust, soft interior, and rich natural flavor.
