Ingredients
- 3 cups (360g) fresh or frozen raspberries
- ¾ cup (150g) granulated sugar
- 2 tablespoons fresh lemon juice
- 2 tablespoons water
- 2 tablespoons cornstarch
- 1 teaspoon vanilla extract
- Pinch of salt
Optional Ingredients
- 1 teaspoon lemon zest
- 1 tablespoon raspberry liqueur
- 1 teaspoon butter (for a glossy finish)
Equipment
- Medium saucepan
- Whisk
- Wooden spoon or silicone spatula
- Fine-mesh strainer (optional)
- Measuring cups and spoons
- Heatproof bowl or jar
Instructions
Step 1: Prepare the Cornstarch Slurry
In a small bowl, whisk together the cornstarch and water until completely smooth.
Set aside.
Step 2: Cook the Raspberries
Add the raspberries, granulated sugar, lemon juice, and a pinch of salt to a medium saucepan.
Cook over medium heat, stirring occasionally, until the berries begin to soften and release their juices, about 5–7 minutes.
Gently mash the berries with a spoon as they cook.
Step 3: Thicken the Filling
Whisk the cornstarch slurry once more, then slowly pour it into the raspberry mixture while stirring continuously.
Cook for another 2–4 minutes, stirring constantly, until the filling becomes thick and glossy.
Step 4: Finish the Filling
Remove the saucepan from the heat.
Stir in the vanilla extract, lemon zest, or butter if using.
For a seedless filling, press the mixture through a fine-mesh strainer into a clean bowl, using the back of a spoon to extract as much fruit as possible.
If you enjoy the texture of raspberry seeds, you can skip this step.
Step 5: Cool
Transfer the filling to a heatproof bowl or jar.
Cover the surface with plastic wrap to prevent a skin from forming.
Allow it to cool to room temperature, then refrigerate for at least 30 minutes until fully chilled and thickened.
Step 6: Use the Filling
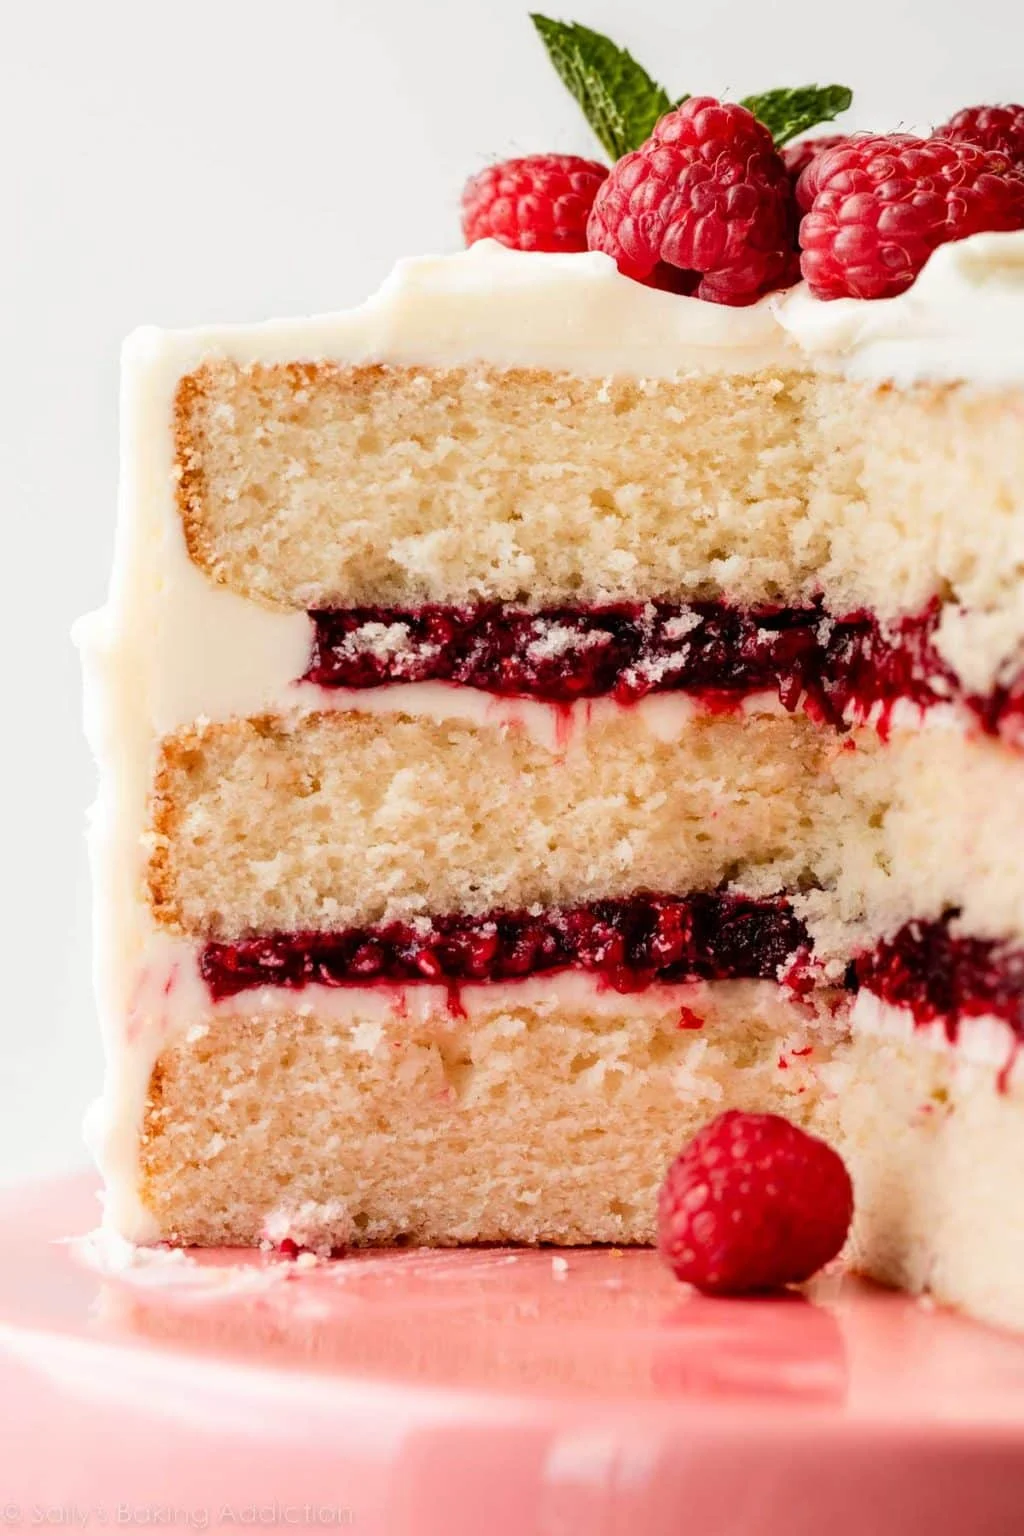
Spread the chilled raspberry filling between cake layers, pipe it into cupcakes, fill pastries, or use it as a topping for cheesecakes, pancakes, waffles, or ice cream.
Tips
- Fresh or frozen raspberries both work well in this recipe.
- Stir constantly after adding the cornstarch to prevent lumps.
- Strain the filling if you prefer a smooth, seedless texture.
- Let the filling cool completely before using it in cakes.
- Chill the filling before assembling layered desserts for easier spreading.
- For a thicker filling, cook it an extra minute or add an additional teaspoon of cornstarch mixed with water.
Variations
Mixed Berry Filling
Replace half of the raspberries with strawberries, blackberries, or blueberries.
Seedless Raspberry Filling
Strain the filling after cooking for an ultra-smooth texture.
Vanilla Raspberry Filling
Increase the vanilla extract to 2 teaspoons for a richer flavor.
Lemon Raspberry Filling
Add extra lemon zest and juice for a brighter citrus flavor.
Chocolate Raspberry Filling
Fold cooled raspberry filling into chocolate ganache for a decadent dessert filling.
Storage
Refrigerator: Store in an airtight container for up to 1 week.
Freezer: Freeze in a freezer-safe container for up to 3 months. Thaw overnight in the refrigerator and stir well before using.
Serving Suggestions
Raspberry Cake Filling is perfect for:
- Layer cakes
- Cupcakes
- Cheesecakes
- Macarons
- Swiss rolls
- Cream puffs
- Danish pastries
- Thumbprint cookies
- Pancakes and waffles
- Ice cream and yogurt parfaits
Nutrition (Per 2 Tablespoons)
- Calories: 45
- Carbohydrates: 11g
- Protein: 0g
- Fat: 0g
- Saturated Fat: 0g
- Cholesterol: 0mg
- Sodium: 5mg
- Fiber: 1g
- Sugar: 9g
Conclusion
Raspberry Cake Filling is a simple yet flavorful recipe that adds a burst of fresh berry goodness to all your favorite baked treats. With its vibrant color, perfectly balanced sweet-tart flavor, and smooth, spreadable texture, it’s ideal for cakes, cupcakes, pastries, and countless other desserts. Easy to make ahead and store, this homemade raspberry filling is a must-have recipe for anyone who loves baking with fresh fruit.
