Why You’ll Love This Recipe
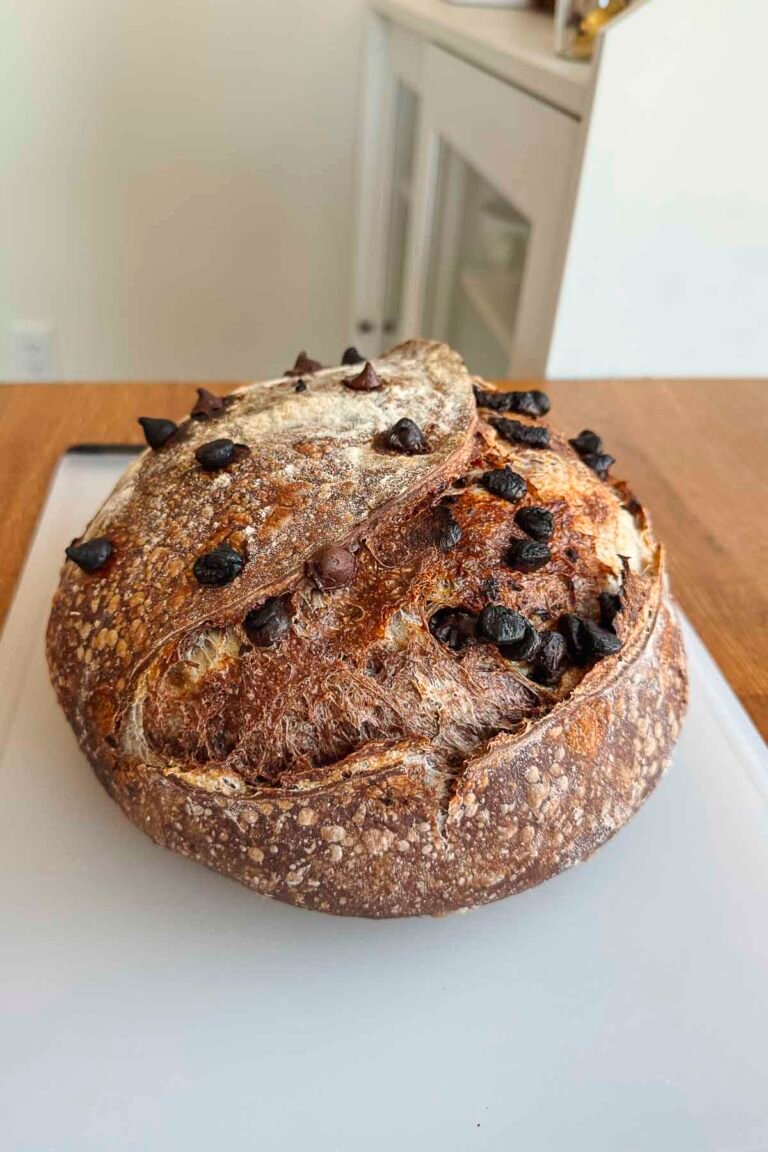
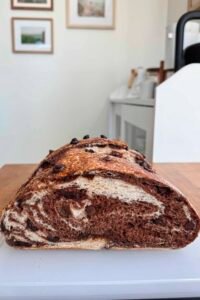
- Beautiful bakery-style marbled appearance
- Rich chocolate flavor balanced by sourdough tang
- Crispy artisan crust
- Naturally fermented
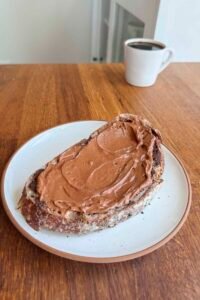
- Perfect for toast and desserts
- No commercial yeast required
Ingredients
For the Base Dough
- 500 g bread flour
- 350 g water (room temperature)
- 100 g active sourdough starter
- 10 g fine sea salt
For the Chocolate Dough Portion
- 15 g unsweetened cocoa powder
- 15 g brown sugar
- 15 g water
- 75 g dark chocolate chips (optional)
Equipment
- Large mixing bowl
- Bench scraper
- Dutch oven
- Banneton basket or bowl lined with a towel
- Kitchen scale
Dough Schedule
Total Time
12–18 hours
Active Time
45 minutes
Bulk Fermentation
4–6 hours
Cold Proof
8–12 hours
Step 1: Feed Your Starter
Use a sourdough starter that has been fed and is at peak activity.
It should double in size and be bubbly.
Step 2: Mix the Dough
In a large bowl combine:
- Water
- Active starter
Stir until dissolved.
Add:
- Bread flour
Mix until no dry flour remains.
Cover and rest for:
30 minutes
This is called the autolyse.
Step 3: Add Salt
Sprinkle salt over the dough.
Mix thoroughly until incorporated.
Cover and rest for:
30 minutes
Step 4: Create the Chocolate Dough
Divide the dough:
- 60% plain dough
- 40% chocolate dough
Mix into the smaller portion:
- Cocoa powder
- Brown sugar
- Water
Knead gently until fully incorporated.
Fold in chocolate chips if desired.
Allow both doughs to rest for:
30 minutes
Step 5: Stretch and Fold
Over the next:
2 hours
Perform 4 sets of stretch-and-folds every 30 minutes.
Work both dough portions separately.
The dough should become smoother and stronger.
Step 6: Bulk Fermentation
Cover both doughs.
Allow them to ferment at room temperature for:
3–4 additional hours
or until noticeably puffy and increased by about 50%.

Step 7: Create the Marble Effect
Lightly flour your work surface.
Gently stretch the plain dough into a rectangle.
Stretch the chocolate dough into a similar shape.
Place one layer on top of the other.
Fold like a letter.
Rotate and gently coil the dough.
Repeat once or twice to create beautiful marbling.
Avoid excessive mixing.
You want visible layers.
Step 8: Shape the Loaf
Shape into a round boule or oval batard.
Place seam-side up into a floured banneton.
Cover.
Step 9: Cold Proof
Refrigerate for:
8–12 hours
This develops flavor and improves oven spring.

Step 10: Preheat the Oven
Place a Dutch oven inside.
Preheat to:
475°F (245°C)
for at least 45 minutes.
Step 11: Score the Dough
Turn the dough onto parchment paper.
Dust lightly with flour.
Score the top with a sharp blade.
A simple curved slash works beautifully.
Step 12: Bake
Transfer carefully into the hot Dutch oven.
Covered Bake
- 20 minutes
Uncovered Bake
- 20–25 minutes
until deeply browned.
Internal temperature should reach:
205–210°F (96–99°C)
Step 13: Cool Completely
Place on a cooling rack.
Allow to cool for:
2 hours
before slicing.
This helps the crumb set properly.

Optional Add-Ins
Chocolate Orange
- 1 tablespoon orange zest
Chocolate Hazelnut
- ½ cup toasted hazelnuts
Chocolate Cherry
- ½ cup dried cherries
Mocha Marble
- 1 teaspoon espresso powder in the chocolate dough
Serving Suggestions
Serve with:
- Salted butter
- Cream cheese
- Nutella
- Berry jam
- Honey
- Mascarpone
- Fresh strawberries
Storage
Room Temperature
- 3–4 days in a bread bag or airtight container
Freeze
- Up to 3 months
Slice before freezing for easy toasting.
Baker’s Tips
✔ Use a strong, active sourdough starter.
✔ Don’t overmix the two doughs when marbling.
✔ Cold proofing enhances both flavor and appearance.
✔ High-quality cocoa powder makes a noticeable difference.
✔ Let the loaf cool fully before cutting to preserve the crumb.
Yield
1 large artisan loaf
Prep Time
45 minutes
Fermentation Time
12–18 hours
Bake Time
40–45 minutes
Total Time
13–19 hours
This Chocolate Marbled Sourdough Bread combines artisan sourdough craftsmanship with rich chocolate swirls, creating a loaf that’s as beautiful to look at as it is delicious to eat.
