Prep Time: 30 minutes (plus fermentation time)
Bulk Fermentation: 4–6 hours
Proofing Time: 8–12 hours
Bake Time: 45–50 minutes
Total Time: Approximately 14–20 hours
Yield: 1 large loaf (10–12 slices)
Why You’ll Love This Recipe
- Perfect for first-time sourdough bakers
- Uses simple pantry ingredients
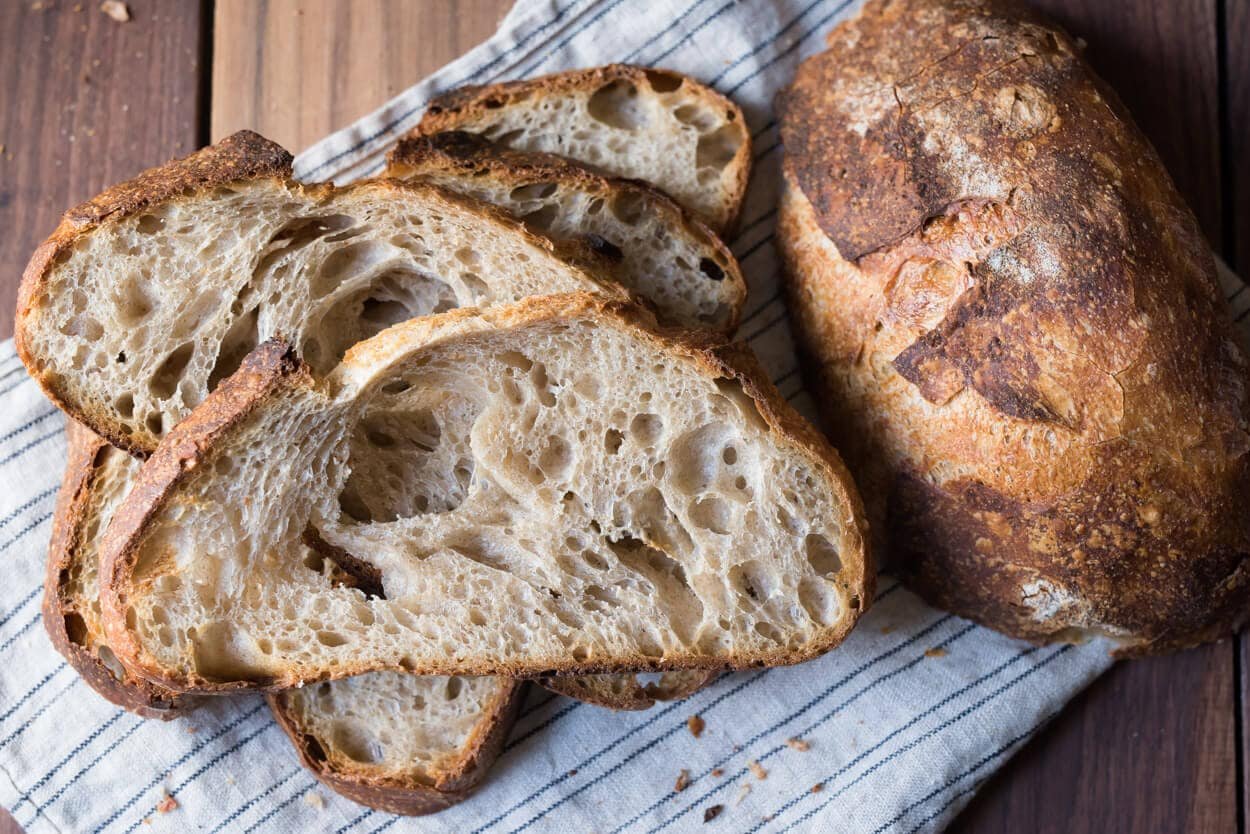
- Develops a beautiful artisan crust
- Soft and airy interior
- Naturally fermented for enhanced flavor
- No commercial yeast required
Ingredients
For the Dough
- 100g active sourdough starter (fed and bubbly)
- 350g warm water
- 500g bread flour
- 10g fine sea salt
For Dusting
- Rice flour or all-purpose flour
Equipment Needed
- Large mixing bowl
- Kitchen scale
- Dough scraper
- Banneton basket or bowl lined with a towel
- Dutch oven with lid
- Parchment paper
- Sharp bread lame or razor blade
Understanding Sourdough Starter
Before beginning, ensure your sourdough starter is active and ready to use. A healthy starter should:
- Double in size within 4–8 hours after feeding
- Look bubbly throughout
- Have a pleasant tangy aroma
- Float in water when tested (optional)
Using an active starter is one of the most important factors for successful sourdough bread.
Step 1: Mix the Dough
In a large mixing bowl, combine:
- 100g active sourdough starter
- 350g warm water
Stir until the starter dissolves into the water.
Add:
- 500g bread flour
Mix until no dry flour remains.
The dough will look shaggy and rough at this stage.
Cover the bowl and let it rest for 30 minutes.
This process is called autolyse, allowing the flour to hydrate and gluten to begin developing naturally.
Step 2: Add Salt
Sprinkle:
- 10g fine sea salt
over the dough.
Using damp hands, gently squeeze and fold the dough until the salt is fully incorporated.
Cover and rest for 30 minutes.
Step 3: Stretch and Fold
To build dough strength:
- Wet your hands.
- Grab one side of the dough.
- Stretch upward gently.
- Fold over itself.
Rotate the bowl and repeat four times.
Cover and rest 30 minutes.
Repeat this process:
- Every 30 minutes
- For a total of 4 sets
You will notice the dough becoming smoother and stronger after each set.
Step 4: Bulk Fermentation
After the final fold, cover the bowl and allow the dough to ferment at room temperature.
Fermentation time varies depending on temperature:
| Room Temperature | Fermentation Time |
|---|---|
| 68°F (20°C) | 6–8 hours |
| 72°F (22°C) | 5–6 hours |
| 75°F (24°C) | 4–5 hours |
The dough is ready when:
- It has increased by about 50%
- Small bubbles appear on the surface
- The dough feels light and airy
Avoid over-proofing, as this can weaken the dough structure.
Step 5: Pre-Shape the Dough
Lightly flour your work surface.
Gently turn the dough out onto the counter.
Using a bench scraper:
- Shape into a loose round
- Avoid pressing out too much air
Let rest uncovered for 20–30 minutes.
This bench rest helps relax the gluten before final shaping.
Step 6: Final Shaping
Lightly flour the top of the dough.
Flip it over so the smooth side faces down.
Fold:
- Top toward center
- Bottom toward center
- Left side toward center
- Right side toward center
Turn the dough over.
Using your hands, gently pull the dough toward yourself across the counter to create surface tension.
A tight outer surface helps create a beautiful oven spring.
Step 7: Cold Proof Overnight
Prepare a banneton basket or towel-lined bowl by dusting generously with rice flour.
Place the dough seam-side up into the basket.
Cover with plastic wrap or a reusable cover.
Refrigerate for:
- 8–12 hours
- Up to 18 hours for deeper flavor
The slow cold fermentation enhances flavor and makes scoring easier.
Step 8: Preheat the Oven
The next day:
Place your Dutch oven inside the oven.
Preheat to:
475°F (245°C)
Allow at least 45 minutes for the Dutch oven to heat thoroughly.
A fully heated Dutch oven creates steam and helps produce a crisp artisan crust.
Step 9: Score the Dough
Cut a piece of parchment paper.
Turn the dough onto the parchment.
Using a bread lame or razor blade:
- Make one deep slash about ½ inch deep
This score directs expansion during baking.
You may also create decorative scoring patterns if desired.
Step 10: Bake
Carefully place the dough into the hot Dutch oven.
Cover with lid.
Bake:
First Bake
- 20 minutes covered
- 475°F (245°C)
The lid traps steam, encouraging maximum rise.
Second Bake
Remove lid.
Reduce oven temperature to:
450°F (230°C)
Bake another:
- 25–30 minutes
until deeply golden brown.
Internal temperature should reach approximately:
205–210°F (96–99°C)
Step 11: Cool Completely
Transfer the bread to a cooling rack.
Allow to cool for at least:
- 1–2 hours
before slicing.
Although tempting, cutting too soon can result in a gummy texture.
Cooling allows the crumb to finish setting properly.
Storage Tips
Room Temperature
Store in a bread bag or wrapped in a clean towel for:
- 3–4 days
Freezing
Slice the loaf and freeze in airtight bags for:
- Up to 3 months
Toast directly from frozen.
Beginner Sourdough Success Tips
✔ Use an active, bubbly starter
✔ Measure ingredients with a digital scale
✔ Be patient during fermentation
✔ Avoid adding excessive flour while shaping
✔ Allow the loaf to cool completely
✔ Practice regularly—every loaf teaches you something new
Serving Ideas
- Warm with salted butter and honey
- Toasted with avocado and eggs
- Paired with soups and stews
- Used for artisan sandwiches
- Served alongside charcuterie boards
- Made into grilled cheese sandwiches
- Turned into homemade croutons
