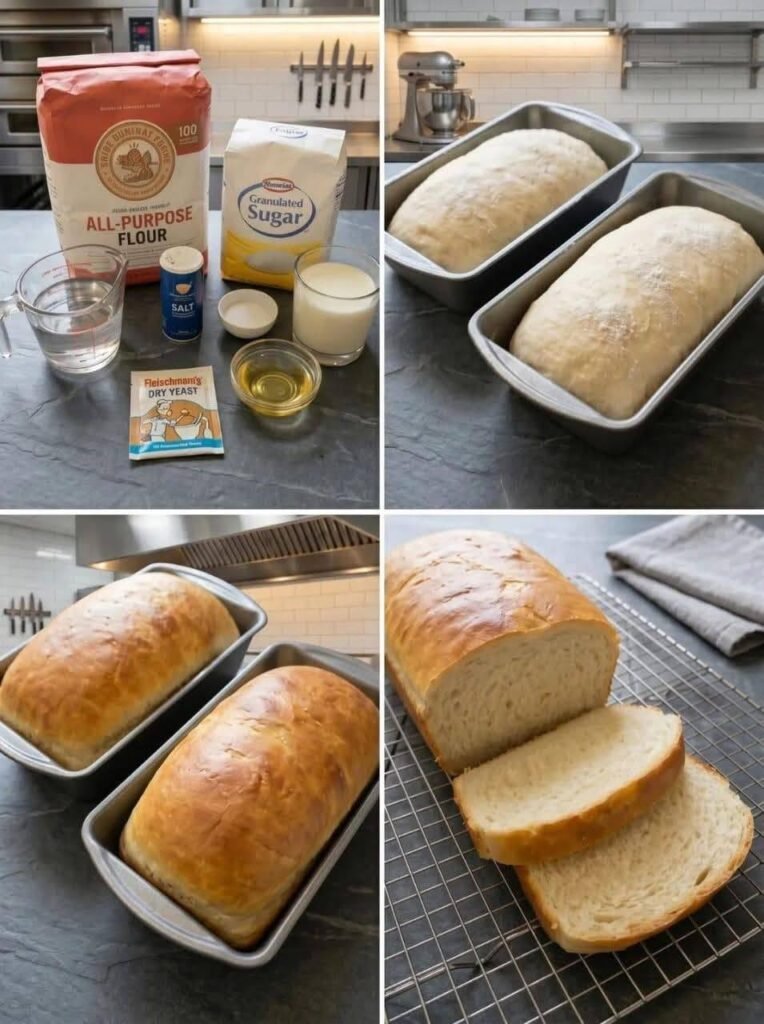

There is something incredibly comforting about the smell of freshly baked bread filling your kitchen. Homemade white sandwich bread is soft, fluffy, slightly sweet, and perfect for everything from morning toast to delicious sandwiches. The best part is that you do not need complicated ingredients or special baking skills to make it at home.
This easy homemade bread recipe uses simple pantry staples such as all-purpose flour, sugar, yeast, salt, milk, water, and a little oil. With a bit of kneading and patience, you can enjoy beautiful golden-brown loaves with a soft, tender crumb.
Whether you are a beginner baker or someone who loves making homemade bread, this recipe is worth trying.
Why You’ll Love This Homemade Bread
This classic white bread is much better than store-bought bread in many ways. It is freshly baked, wonderfully soft, and can be enjoyed while it is still warm.
The recipe is also budget-friendly because most of the ingredients are probably already available in your kitchen. You can make two loaves at once, making it a great option for families.
The bread has a light texture and mild flavor, so it works perfectly with both sweet and savory foods. Serve it with butter and jam for breakfast, use it for sandwiches at lunch, or simply enjoy a warm slice with your favorite spread.
Ingredients
To make two homemade sandwich bread loaves, you will need:
- 4 cups all-purpose flour
- 2¼ teaspoons active dry yeast
- 2 tablespoons granulated sugar
- 1½ teaspoons salt
- 1 cup warm milk
- ½ cup warm water
- 2 tablespoons vegetable oil
- Extra flour for kneading, if needed
- A little oil or butter for greasing the pans
Make sure your milk and water are warm rather than hot. Very hot liquid can damage the yeast and prevent the dough from rising properly.
Step 1: Activate the Yeast
Start by combining the warm water, sugar, and yeast in a small bowl. Stir gently and allow the mixture to sit for about 5–10 minutes.
If the yeast is active, you should notice a light layer of foam on the surface. This is a good sign that your yeast is ready to use.
If there is no activity after several minutes, the yeast may be old or the liquid may have been too hot or too cold. It is better to check this before adding all your ingredients.
Step 2: Prepare the Dough
In a large mixing bowl, add the all-purpose flour and salt. Mix them together.
Add the activated yeast mixture, warm milk, and vegetable oil. Begin mixing with a spoon or your hands until the ingredients come together and form a rough dough.
Transfer the dough to a lightly floured surface and begin kneading.
Step 3: Knead Until Smooth
Kneading is one of the most important steps in making soft homemade bread.
Knead the dough for approximately 8–10 minutes, or until it becomes smooth, elastic, and slightly soft. If the dough feels extremely sticky, add a small amount of flour at a time. Avoid adding too much flour because this can make the finished bread heavy and dense.
You can also knead the dough using a stand mixer fitted with a dough hook if you prefer.
The finished dough should feel soft and elastic rather than stiff.
Step 4: First Rise
Place the kneaded dough into a lightly oiled bowl. Turn it once so that the surface is lightly coated with oil.
Cover the bowl with plastic wrap or a clean kitchen towel and place it somewhere warm.
Allow the dough to rise for about 1–1½ hours, or until it has approximately doubled in size.
The exact rising time can vary depending on the temperature of your kitchen. On a warm day, the dough may rise faster, while a cooler kitchen can take longer.
Step 5: Shape the Loaves
Once the dough has doubled, gently press it down to remove excess air.
Divide the dough into two equal portions.
Shape each portion into a loaf by gently flattening the dough into a rectangle and rolling it tightly from one end to the other. Pinch the seam closed and place each loaf into a greased loaf pan with the seam facing down.
Try to distribute the dough evenly in the pans so that the bread rises beautifully.
Step 6: Second Rise
Cover the loaf pans again with a clean towel and allow the dough to rise for another 30–45 minutes.
The dough should become noticeably puffy and rise toward the top of the pans.
Do not rush this stage. Proper proofing helps create the soft and airy texture that makes homemade sandwich bread so delicious.
Step 7: Bake the Bread
Preheat your oven to 375°F (190°C).
Place the prepared loaf pans in the preheated oven and bake for approximately 30–35 minutes, or until the tops are beautifully golden brown.
Your kitchen should start smelling amazing as the bread bakes!
If the tops become brown too quickly, you can loosely cover the loaves with aluminum foil during the final part of baking.
Step 8: Cool Before Slicing
When the bread is finished, remove the pans from the oven and allow the loaves to cool for a few minutes.
Carefully remove the bread from the pans and place the loaves on a wire cooling rack.
Although it can be tempting to slice the bread immediately, allowing it to cool helps the interior finish setting properly.
Once cooled, use a sharp bread knife to cut even slices.
Tips for Perfect Homemade White Bread
Use fresh yeast: Old yeast may not rise properly, resulting in dense bread.
Do not over-flour the dough: A little stickiness is normal. Too much flour can make the bread dry.
Give the dough enough time to rise: Rising time depends on room temperature, so look for the dough to double in size rather than relying only on the clock.
Preheat the oven: A properly heated oven helps the bread rise and develop a beautiful crust.
Let the bread cool: Cooling makes slicing easier and helps maintain the soft texture inside.
How to Store Homemade Bread
Once completely cooled, store your homemade bread in an airtight container or bread bag at room temperature.
It is best enjoyed within a few days. You can also slice the bread and freeze it for longer storage. Place parchment paper between slices if you want to remove individual pieces easily.
When you need bread, simply thaw the slices at room temperature or warm them gently in a toaster.
Ways to Enjoy This Bread
This soft white sandwich bread is incredibly versatile.
Use it to make classic sandwiches with cheese, vegetables, chicken, or eggs. Toast a slice and spread it with butter and homemade jam for breakfast. You can also use it for French toast, grilled cheese sandwiches, bread pudding, or simple garlic toast.
Freshly baked bread also tastes wonderful with a bowl of soup or stew.
Final Thoughts
Making homemade white sandwich bread may seem intimidating at first, but this recipe proves that delicious bread can be made with simple ingredients and a little patience. The combination of soft dough, proper rising, and careful baking creates loaves that are golden on the outside and wonderfully fluffy inside.
Once you make this recipe at home, you may find yourself choosing homemade bread over store-bought bread more often. The aroma, texture, and fresh flavor are simply hard to beat.
So gather your flour, yeast, milk, and other simple ingredients, and give this easy homemade sandwich bread recipe a try. Fresh, soft, golden, and delicious—nothing beats the taste of bread made from scratch!