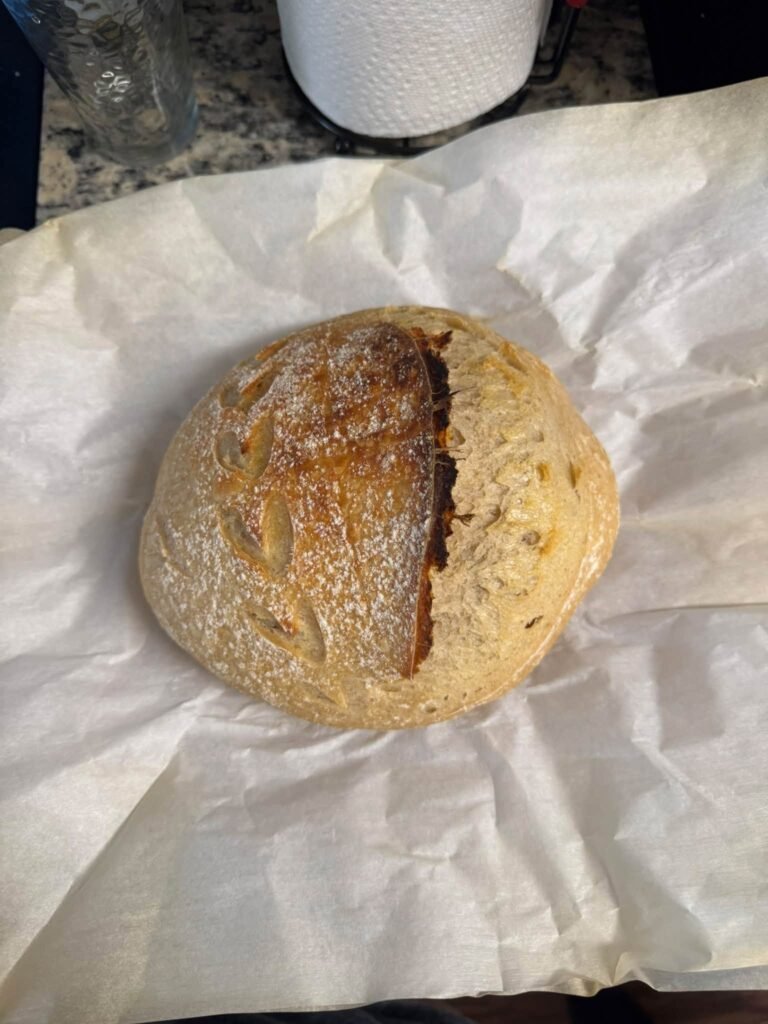
Agar aapko image jaisi rustic, bakery-style homemade bread pasand hai, to yeh recipe perfect hai. Is bread ki sab se khas baat iska golden-brown crispy crust, beautiful scoring aur andar se soft, airy aur slightly chewy texture hai. Yeh loaf breakfast, sandwiches, soup ke saath ya simple butter ke saath bohat delicious lagta hai.Is recipe ko ghar par banane ke liye thori patience zaroor chahiye, especially agar aap sourdough starter use kar rahe hain. Lekin result definitely worth it hai!IngredientsFor the Dough
500g bread flour ya strong all-purpose flour
350g lukewarm water
100g active sourdough starter
10g salt
1 tablespoon olive oil, optional
Extra flour for dusting
Agar aap beginner hain aur sourdough starter available nahi hai, to neeche instant-yeast option bhi diya gaya hai.Optional Flavor AdditionsAap apni bread ko aur interesting banane ke liye dough mein yeh ingredients add kar sakte hain:
1 teaspoon dried rosemary
1 teaspoon dried oregano
2 tablespoons sunflower seeds
2 tablespoons pumpkin seeds
2 tablespoons chopped olives
2 cloves finely chopped garlic
Tip: Ek loaf mein bohat zyada fillings add na karein, warna dough heavy ho sakta hai.Step 1: Prepare the Sourdough StarterSab se pehle ensure karein ke aapka sourdough starter active aur bubbly ho. Active starter woh hota hai jo feeding ke baad achi tarah rise kare aur us mein bubbles nazar aayen.Agar starter fresh hai, use feeding ke baad room temperature par kuch hours ke liye rakhein. Jab woh noticeably rise ho jaye aur bubbles show kare, tab bread banane ke liye ready hai.Agar starter active nahi hoga to bread properly rise nahi karegi.Step 2: Make the DoughEk large mixing bowl mein 350g water aur 100g active sourdough starter add karein. Dono ko whisk ya spoon se mix karein.Ab 500g flour add karein aur wooden spoon ya apne hands se mix karein. Is stage par dough thora rough aur sticky hoga. Don’t worry—yeh bilkul normal hai.Dough ko cover karke approximately 30 minutes rest karne dein.Is resting process ko autolyse kaha jata hai. Is se flour water absorb karta hai aur dough ko baad mein handle karna easier ho jata hai.Step 3: Add Salt30 minutes ke baad dough mein 10g salt add karein.Thore se water mein salt dissolve karke dough mein mix karna easy hota hai. Dough ko stretch aur fold karte hue salt properly incorporate karein.Ab dough ko smooth hone tak gently work karein. Dough sticky ho sakta hai, isliye har waqt extra flour add karne se avoid karein. Zyada flour bread ko dense bana sakta hai.Step 4: Stretch and FoldAb bread ka sab se important part aata hai.Dough ko bowl mein rakh kar ek side se stretch karein aur center ki taraf fold karein. Bowl ko rotate karein aur same process repeat karein.Isay stretch and fold kehte hain.Pehle 2 hours ke dauran har 30 minutes baad stretch and fold karein. Total 4–5 rounds usually enough hote hain.Aap notice karenge ke dough gradually stronger, smoother aur elastic hota jayega.Agar aap rosemary, olives, seeds ya garlic add karna chahte hain, to 2nd ya 3rd fold ke waqt add karein.Step 5: Bulk FermentationAb dough ko cover karke room temperature par ferment hone dein.Time temperature par depend karta hai. Warm kitchen mein fermentation relatively fast hogi, jab ke cool kitchen mein zyada time lag sakta hai.Dough ko sirf clock ke hisaab se judge na karein. Jab dough visibly expanded ho, bubbles show kare aur thora jiggly feel ho, to woh next step ke liye ready hai.Usually 4–8 hours lag sakte hain.Step 6: Shape the LoafCounter par halka sa flour dust karein aur dough ko carefully bowl se nikaalein.Dough ko gently shape karke round boule bana lein. Koshish karein ke surface par thori tension create ho jaye.Ek proofing basket ya bowl ko generously flour karein. Dough ko basket mein seam-side up place karein.Ab dough ko cover karein.Step 7: Cold ProofingBest flavor aur texture ke liye dough ko refrigerator mein 8–12 hours ke liye rakh dein.Overnight proofing is recipe ke liye especially convenient hai. Aap raat ko dough prepare karke refrigerator mein rakh sakte hain aur next morning fresh bread bake kar sakte hain.Cold fermentation se sourdough ka flavor bhi deeper aur more complex hota hai.Step 8: Score the BreadNext day oven ko 230–250°C par preheat karein.Agar aapke paas Dutch oven hai, use bhi preheat karein.Dough ko carefully parchment paper par turn karein. Ab ek sharp bread lame ya very sharp knife se top par scoring karein.Image jaisi rustic appearance ke liye aap ek long curved slash ya several decorative cuts bana sakte hain.Scoring sirf decoration nahi hoti. Yeh bread ko oven mein expand hone ke liye controlled direction deti hai.Step 9: BakeBread ko preheated Dutch oven mein carefully place karein.Lid cover karke approximately 20 minutes bake karein.Phir lid remove karein aur another 20–25 minutes bake karein, ya jab tak crust deep golden brown na ho jaye.Agar aapko extra crispy crust pasand hai, to last few minutes mein bread ko carefully observe karein aur desired color tak bake karein.Bread bake hone ke baad usay immediately cut na karein.Step 10: Let It CoolFresh bread ko wire rack par minimum 1 hour cool hone dein.Yeh step boring lag sakta hai, lekin bohat important hai. Bread ke andar cooking process cooling ke dauran continue hota hai. Agar aap bohat jaldi slice karenge, to crumb gummy ya sticky ho sakta hai.Completely cool hone ke baad serrated bread knife se slice karein.Aapko bahar se crunchy crust aur andar se soft, chewy texture milega.No Sourdough Starter? Try This Easy VersionAgar aapke paas sourdough starter nahi hai, to aap instant yeast use kar sakte hain.Use:
500g flour
350g water
7g instant yeast
10g salt
1 tablespoon olive oil
Sab ingredients combine karke dough prepare karein. Dough ko approximately 1–2 hours rise hone dein, shape karein aur second proof ke baad bake karein.Ye version sourdough jitna tangy nahi hoga, lekin crusty rustic bread ke liye bohat achha result dega.Tips for Perfect Rustic Bread1. Dough mein extra flour na daalein: Sticky dough normal hai. Wet hands se dough handle karna better hai.2. Oven properly preheat karein: High heat bread ko beautiful oven spring deti hai.3. Dutch oven use karein: Covered baking se steam trap hoti hai, jis se crust better develop hoti hai.4. Starter active hona chahiye: Weak starter ki wajah se loaf dense reh sakta hai.5. Bread ko cool hone dein: Cutting se pehle patience rakhein.6. Dark crust se na darein: Rustic sourdough ka deep golden-brown crust flavor ka important part hota hai.Final ThoughtsHomemade rustic sourdough bread banana pehli dafa thora intimidating lag sakta hai, lekin process samajh aajaye to yeh ek enjoyable baking project ban jata hai. Is recipe ka secret simple ingredients, proper fermentation, gentle dough handling aur high-temperature baking hai.Aap is loaf ko butter, honey, jam, eggs, cheese ya soup ke saath serve kar sakte hain. Freshly baked bread ki crispy crust aur warm, chewy center kisi bhi breakfast ko special bana deti hai.Agar aap image wali bread jaisi exact recipe chahte hain, to main isi photo ke style mein SEO-friendly 1000-word blog + ingredients + cooking time + prep time + FAQs + meta description + Pinterest title bhi ready kar sakta hoon.
 No Comments

 Fresh Fruit Salad