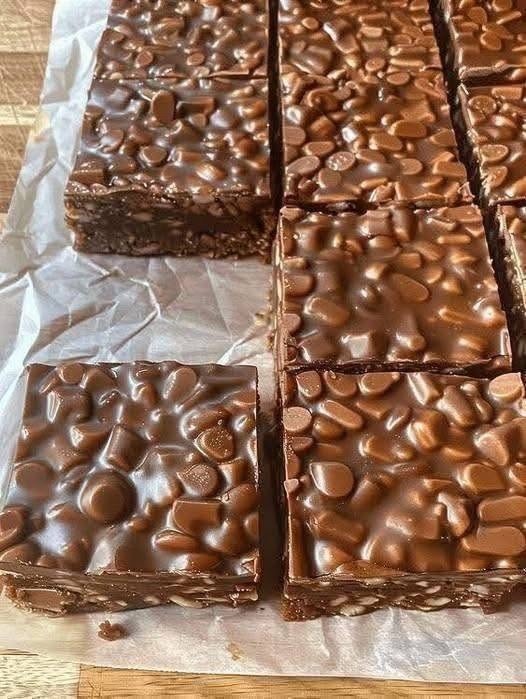

Agar aap chocolate aur crunchy nuts ke fan hain, to yeh Chocolate Nut Bars aapko zaroor pasand aayengi. Yeh delicious homemade bars rich chocolate flavor, crunchy nuts aur smooth glossy chocolate topping ka perfect combination hain. Sab se achi baat yeh hai ke inhein banane ke liye oven ki zaroorat nahi hoti. Sirf kuch simple ingredients, thoda sa mixing aur chilling time chahiye.
Yeh chocolate bars tea time, parties, family gatherings, lunchbox treats aur special occasions ke liye perfect hain. Aap inhein pehle se prepare karke refrigerator mein rakh sakte hain aur jab dil kare ek delicious chocolate square enjoy kar sakte hain.
Why You’ll Love These Chocolate Nut Bars
In chocolate bars ki sab se khaas baat unka texture hai. Neeche chocolate ka soft aur slightly crunchy base hota hai, jabke upar melted chocolate aur nuts ki generous layer hoti hai. Har bite mein creamy chocolate ke saath nuts ka crunch milta hai.
Aap apni pasand ke nuts bhi use kar sakte hain. Almonds, peanuts, walnuts, hazelnuts aur pistachios sab is recipe mein delicious lagte hain.
Is recipe ka ek aur benefit yeh hai ke yeh no-bake dessert hai. Agar aap baking mein beginner hain ya oven available nahi hai, tab bhi aap easily yeh bars bana sakte hain.
Ingredients
For the Chocolate Nut Base
- 250 g digestive biscuits or plain tea biscuits
- 100 g roasted peanuts
- 75 g chopped almonds
- 50 g chopped walnuts
- 200 g milk or semi-sweet chocolate
- 100 g unsalted butter
- 3 tablespoons cocoa powder
- 3 tablespoons honey or golden syrup
- 1 teaspoon vanilla extract
For the Chocolate Topping
- 250 g milk or dark chocolate
- 1 tablespoon coconut oil or butter
- 100–150 g mixed nuts
- A pinch of sea salt, optional
You can increase or decrease the amount of nuts according to your preference.
How to Make Chocolate Nut Bars
Step 1: Prepare the Pan
Start by preparing an approximately 8×8-inch square baking pan. Line it with parchment paper, leaving a little extra paper hanging over the sides. This will make it much easier to remove the chocolate bars once they are chilled.
Lightly grease the parchment paper with a little butter or oil.
Step 2: Crush the Biscuits
Place the digestive biscuits in a food processor and pulse until you have a mixture of fine crumbs and some small pieces.
Don’t turn all the biscuits into a completely fine powder. A few slightly larger pieces will give the bars a better texture and make them more interesting to eat.
If you don’t have a food processor, simply put the biscuits into a sealed bag and crush them with a rolling pin.
Step 3: Add the Nuts
Add the roasted peanuts, chopped almonds and walnuts to the crushed biscuits. Mix everything together thoroughly.
You can also add hazelnuts, pistachios or cashews if you like. Roasting the nuts before using them gives the bars a much deeper and more delicious flavor.
Step 4: Make the Chocolate Mixture
Place the butter, 200 g chocolate, cocoa powder and honey in a heatproof bowl.
Melt the ingredients over a pan of gently simmering water, making sure the bottom of the bowl doesn’t touch the water. Stir continuously until everything is smooth and glossy.
Alternatively, you can melt the mixture in the microwave in short 20–30 second intervals, stirring between each interval.
Once melted, remove from the heat and stir in the vanilla extract.
Step 5: Combine Everything
Pour the melted chocolate mixture over the crushed biscuits and nuts.
Mix everything together until the biscuit and nut mixture is completely coated with chocolate. It should look thick, rich and fudgy.
Transfer the mixture to your prepared pan and press it down firmly using the back of a spoon or a flat spatula.
Make sure you press the mixture evenly into all corners. This helps the bars hold their shape when cut.
Step 6: Prepare the Chocolate Topping
Now comes the best part—the glossy chocolate topping!
Melt 250 g of chocolate with one tablespoon of coconut oil or butter. Stir until completely smooth.
Pour the melted chocolate over the prepared base and spread it evenly.
Before the chocolate sets, sprinkle plenty of roasted mixed nuts over the top. Gently press the nuts into the chocolate so they stay in place after chilling.
For an extra flavor boost, sprinkle a tiny pinch of sea salt over the top.
Step 7: Chill
Place the pan in the refrigerator for approximately 2–3 hours, or until the chocolate has completely set.
For the best results, don’t try to cut the bars while the chocolate is still soft. Allowing them enough time to chill will give you neat, firm squares.
Once completely set, remove the slab from the pan using the parchment paper.
Step 8: Cut Into Bars
Use a sharp knife to cut the chocolate slab into squares or rectangular bars.
For clean cuts, dip the knife in hot water, wipe it dry and then slice. Repeat this process between cuts if necessary.
You can make small bite-sized squares for parties or larger bars for an indulgent dessert.
Tips for Perfect Chocolate Nut Bars
Use good-quality chocolate: Since chocolate is the main ingredient, using good-quality chocolate can make a noticeable difference in the final flavor.
Roast your nuts: Roasting nuts enhances their natural flavor and makes them extra crunchy.
Don’t over-crush the biscuits: Keeping a few small chunks gives the base a wonderful texture.